Specifying tolerances often leads to over-engineered parts with unclear cost impact. Based on CNC experience across aerospace, medical, and audio sectors, implementing ISO 2768 requires careful analysis of your design requirements.
ISO 2768 can reduce drawing complexity by 40-60% and cut machining costs on non-critical features, but only when applied to appropriate dimensions. Success depends on matching tolerance classes to functional requirements.
Learn the seven critical questions that determine whether ISO 2768 will save money on your parts, including validation methods from real CNC production.
Table of Contents
What Percentage of My Tolerances Are Actually Critical?
Most product developers over-specify tolerances by 60-80%, applying tight dimensional control to features that don’t affect function, fit, or performance. Critical tolerances should only govern mating surfaces, threaded features, and assembly interfaces—typically 15-25% of total part dimensions.
We regularly audit customer drawings and find parts with 20+ individual tolerance callouts where only 4-6 dimensions actually impact assembly or function. For example, a recent audio enclosure project specified ±0.025 mm on decorative chamfers and non-contact surfaces, adding 35% to machining cost with zero performance benefit. After switching non-critical features to ISO 2768-m (±0.1 mm for dimensions under 30 mm), the customer saved $12 per part without any assembly issues.
Use this checklist to identify truly critical tolerances:
- ✓ Mating surfaces between parts or assemblies
- ✓ Threaded holes and fastener mounting locations
- ✓ Bearing surfaces, shafts, or sliding interfaces
- ✓ Seal grooves or gasket contact areas
- ✗ Decorative chamfers, fillets, and cosmetic radii
- ✗ Non-contact external surfaces and pocket floors
- ✗ Reference dimensions and overall envelope sizes
In CNC machining, every tight tolerance requires slower feeds, additional tool changes, and extended inspection time. Medical device housings may require functional sealing surfaces at ±0.05 mm, while decorative features can easily accept ±0.2 mm per ISO 2768-c.
Design Takeaway: Audit your current drawings using the checklist above—only dimensions marked with ✓ need individual tolerances. Everything else can use ISO 2768 classes, reducing drawing complexity and machining cost without compromising part performance.
Can My Assembly Fits Handle ISO 2768 Tolerances?
ISO 2768-m provides ±0.1 mm tolerance for dimensions up to 30 mm, which works for most clearance fits but may be too loose for interference fits or precision assemblies requiring H7/g6 or tighter relationships. Use this quick assessment to determine compatibility before switching from individual tolerances.
Quick Fit Compatibility Assessment:
- Clearance fits >0.2 mm: ✓ Safe for ISO 2768-m
- Slip fits 0.1-0.2 mm: ⚠️ Use with caution, prototype first
- Press fits <0.1 mm: ✗ Keep individual tolerances
- Precision bearings/bushings: ✗ Keep individual tolerances
- Threaded interfaces: ✗ Keep individual tolerances
5-Minute Stack-Up Check:
- Identify your tightest assembly clearance requirement
- Double the ISO 2768 tolerance for worst-case stack (±0.1 mm becomes 0.2 mm total variation)
- If 0.2 mm variation exceeds your clearance requirement, keep individual tolerances
- If you have >0.3 mm safety margin, ISO 2768-m is safe
During a recent medical device project, housing-to-cover fits originally specified ±0.025 mm for 0.05 mm interference. ISO 2768-m would create 0.2 mm total variation—turning controlled interference into unpredictable assembly. However, non-critical mounting bosses and pilot holes easily handled the standard tolerance.
Design Takeaway: Run the 5-minute check above on your three tightest assembly interfaces. If they pass, apply ISO 2768-m to all non-mating features, reference dimensions, and cosmetic surfaces where ±0.1 mm won’t affect function.

How Much Extra Am I Paying for Unnecessary Precision?
Tight tolerances can increase CNC machining costs by 25-150% depending on feature complexity, with ±0.025 mm costing 30-50% more than ±0.1 mm on typical aluminum parts. Use this quick cost estimation method to quantify potential savings without detailed analysis.
Quick Cost Impact Calculator:
- ±0.1 mm (ISO 2768-m): Baseline cost (1.0x)
- ±0.05 mm: +25-40% cost (1.3x multiplier)
- ±0.025 mm: +50-75% cost (1.6x multiplier)
- ±0.01 mm: +100-150% cost (2.2x multiplier)
30-Second Savings Estimate:
- Count total tolerance callouts on your drawing
- Identify how many could use ISO 2768-m (non-critical features)
- Multiply convertible features by cost reduction: ±0.025→±0.1 mm = ~35% savings per feature
- Estimate total part savings: (# convertible features ÷ total features) × 35%
Break-Even Analysis: If you’re making >10 parts, tolerance review pays off. We recently saved a customer $33 per bracket ($85→$52) by converting 12 non-critical dimensions from ±0.025 mm to ISO 2768-m, with zero functional impact. The analysis took 20 minutes; savings exceeded $300 on a 10-piece order.
Volume Impact Thresholds:
- 1-10 parts: Minor savings, may not justify analysis time
- 10-100 parts: Significant savings, worth 30-minute review
- 100+ parts: Major cost impact, detailed tolerance audit recommended
Design Takeaway: Use the 30-second method above to estimate savings potential. If estimated savings exceed $50 per part or $500 total order value, invest time in detailed tolerance optimization using ISO 2768 standards.
Do My Suppliers Actually Understand ISO 2768?
Most North American and European CNC shops understand ISO 2768, but approximately 30% still prefer individual tolerance callouts due to liability concerns or unfamiliarity with the standard. The fastest validation method is a simple quote request that reveals their true understanding without ordering parts.
The easiest way to test supplier knowledge is through a straightforward part drawing with ISO 2768-m called out in the title block. Send them something like a mounting bracket with 3-4 dimensions lacking individual tolerance callouts and request a detailed quote. A supplier who truly understands the standard will immediately reference ±0.1 mm for dimensions under 30 mm and explain their inspection approach for general tolerances.
Supplier Knowledge Indicators:
- Quotes 25-40% lower pricing for ISO 2768 vs individual tolerances
- References specific tolerance values (±0.1 mm for <30 mm dimensions)
- Has ISO 2768 charts posted in quality department
- Explains difference between Fine, Medium, and Coarse classes
- Knows unmarked dimensions default to specified tolerance class
We recently discovered a supplier claiming ISO 2768 familiarity but quoting identical pricing for both ±0.025 mm individual tolerances and ISO 2768-m general tolerances. When questioned, they admitted to machining everything “as tight as possible” regardless of specification—exactly the expensive approach ISO 2768 is designed to avoid.
For international suppliers, especially in Asia, provide the ISO 2768 tolerance table directly with your drawings since many prefer GB/T or JIS standards. Include explicit tolerance class definitions: “General tolerances per ISO 2768-mK” rather than assuming universal understanding across different manufacturing regions.
Design Takeaway: Test supplier knowledge with a quote request on a simple part before risking production orders. Suppliers demonstrating proper ISO 2768 pricing and quality procedures earn priority for pilot projects, while those struggling need education or replacement with ISO-capable alternatives.
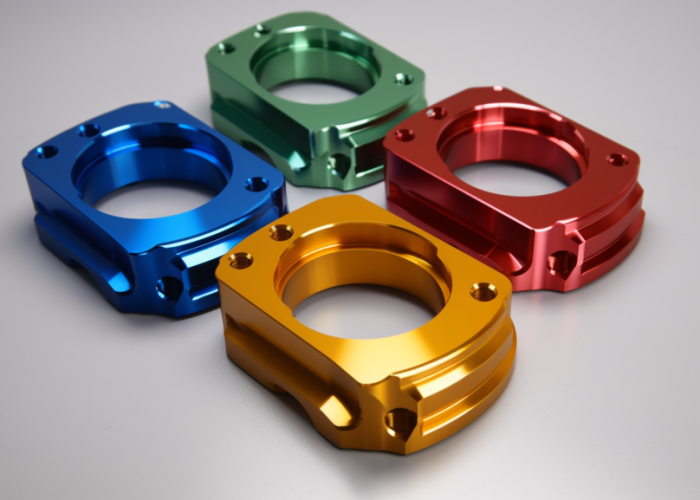
Which Parts Should I Test ISO 2768 On First?
Start with low-risk, non-critical parts that have minimal assembly interfaces and forgiving functional requirements—such as brackets, housings, or covers with >0.3 mm clearances. Target designs with 5-15 tolerance callouts where 70% or more dimensions are non-critical to function.
Look through your current part portfolio for designs living in that sweet spot between simple and realistic. You want parts complex enough to generate meaningful savings but forgiving enough to handle ±0.1 mm variation without assembly problems. The ideal test candidate has multiple non-critical tolerance callouts, generous assembly clearances, and quantities large enough to demonstrate cost impact—typically 10-50 pieces per order.
Best Pilot Part Characteristics:
- Equipment housings with standard cable/connector clearances
- Mounting brackets using common hardware (M6, M8 bolts)
- Decorative covers where precise fits aren’t functionally critical
- Structural components with >0.5 mm assembly gaps
- Parts requiring <3 critical mating surfaces with other components
Consider an electronics enclosure project where we transitioned from individual tolerances to ISO 2768-c. The housing had twelve tolerance callouts controlling mostly cosmetic features and cable access holes with 1.0 mm clearances. Perfect pilot candidate—enough specifications to show measurable savings, but nothing that would fail if dimensions varied by ±0.2 mm instead of ±0.05 mm. Results showed 55% machining time reduction with identical assembly performance.
Avoid precision assemblies, bearing surfaces, or safety-critical parts for initial testing. Save high-volume production runs (>100 pieces) until after successful validation, since dimensional issues become expensive quickly at scale.
How Will This Affect My Design Review Cycles?
ISO 2768 can reduce design review time by 30-40% by eliminating tolerance discussions on non-critical features, but requires upfront investment in tolerance classification and supplier education. Use this assessment to determine if your current review inefficiencies justify implementing the standard.
Does your team spend >20 minutes per drawing debating tolerances on decorative features? Do you frequently specify ±0.025 mm on non-functional chamfers? Are review meetings dominated by tolerance discussions rather than functional analysis? If yes to two or more, ISO 2768 will likely improve workflow significantly.
We tracked one medical device team spending 36 minutes of every 90-minute review on tolerance specification—mostly for non-functional features. After ISO 2768 implementation, those discussions dropped to 14 minutes, freeing time for regulatory compliance. However, teams already running efficient 30-minute reviews saw only marginal improvement.
ROI Decision Framework: Calculate current engineering time cost for tolerance specification. At $150/hour, 30 minutes per drawing costs $75. ISO 2768 reduces this to $25-40, saving $35-50 per drawing. For teams processing 20+ drawings monthly, training investment pays back within 8-12 weeks.
Training requires 4-6 hours per engineer. Compare this investment against projected savings from streamlined reviews for parts with 10+ tolerance callouts where 60-70% are non-critical.
Design Takeaway: If your team spends >25% of review time on non-critical tolerance debates and processes 15+ drawings monthly, ISO 2768 implementation will likely pay for itself within 2-3 months through improved workflow efficiency.
What Are the Risks if ISO 2768 Doesn't Work?
The primary risks include assembly failures from inadequate precision control, supplier misinterpretation leading to dimensional variations, and potential rejection costs up to $3000 per batch for complex assemblies. Use this risk assessment to determine if your parts and processes can handle potential failures.
How many assemblies have <0.2 mm clearances? Do you work in regulated industries? Are suppliers unfamiliar with ISO standards? Do you produce >100 pieces per order? High scores indicate elevated risk requiring careful implementation.
Risk vs Benefit Evaluation: Compare potential failure costs against projected savings. If ISO 2768 saves $30 per part but failure costs $200 in rework, you need >85% success rate to break even. Parts with generous clearances (>0.5 mm) rarely fail. Precision assemblies present higher failure probability.
A precision instrument project experienced $2400 rejection costs when supplier misinterpretation caused failures on 25 parts. However, annual ISO 2768 savings exceeded $15,000 across multiple projects, making occasional failures economically acceptable.
Go/No-Go Criteria: Proceed if projected annual savings exceed 5x potential failure costs. Avoid if >30% of tolerances are functionally critical, assemblies require precision fits, or suppliers lack ISO 2768 experience.
Design Takeaway: Calculate risk-to-reward ratio using projected savings versus potential failure costs. If savings exceed failure costs by 5:1 ratio and <30% of tolerances are functionally critical, ISO 2768 risk is typically acceptable.
Conclusion
ISO 2768 can significantly reduce drawing complexity and machining costs, but success depends on careful tolerance classification and supplier validation. Start with low-risk pilot parts to prove cost benefits before expanding to critical assemblies. Contact us to explore manufacturing solutions tailored to your ISO 2768 implementation requirements.
Frequently Asked Questions
Avoid ISO 2768 for precision fits, press fits with <0.1 mm interference, bearing surfaces, threaded interfaces, and assemblies requiring clearances tighter than 0.2 mm. Keep individual tolerances for functionally critical dimensions.
Approximately 70% of North American and European shops understand ISO 2768, but always verify supplier knowledge through quote requests before production. Provide tolerance tables for international suppliers unfamiliar with ISO standards.
Typical cost reductions range from 25-50% on non-critical features by eliminating tight tolerance machining requirements. Actual savings depend on part complexity, current tolerance specifications, and supplier capabilities with general tolerances.
Fine (f) = ±0.05 mm, Medium (m) = ±0.1 mm, Coarse (c) = ±0.2 mm for dimensions up to 30 mm. Medium class works for most applications, while Fine suits precision requirements and Coarse handles non-critical features.
Yes. Apply individual tolerances to critical features requiring precise control, and use ISO 2768 for non-functional dimensions. This hybrid approach maximizes cost savings while maintaining assembly requirements.
ISO 2768-m (medium class) provides ±0.1 mm tolerance for dimensions up to 30 mm, ±0.15 mm for 30-120 mm, and ±0.2 mm for 120-400 mm. This covers most general machining applications without individual tolerance specifications.


