When Does Laser Marking Make Sense for Your Parts?
Laser marking seems straightforward, but deciding when it actually fits your design isn’t always clear. Engineers often struggle with questions about readability, durability, and whether marking affects precision. This post is written to cut through those doubts and give you a clear framework for when laser marking makes sense.
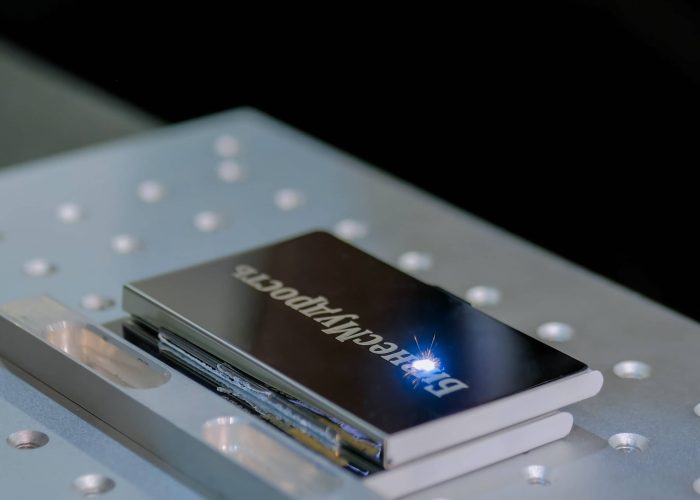
Laser marking is worth using when the part material produces permanent, high-contrast marks without affecting tolerances, and when traceability, identification, or compliance require durable labeling. It works best on metals and certain plastics with accessible, markable surfaces.
Learn how to assess material fit, avoid geometry and tolerance issues, and compare costs with engraving to make the right choice for your part.
Table of Contents
Is my part material suitable for laser marking?
Metals are the reliable choice. Aluminum, stainless steel, and titanium consistently produce permanent, readable marks without touching fit or dimensions. Many plastics can be marked, but only if the specific grade is formulated to create contrast; otherwise marks look faint at release or fade after cleaners, abrasion, or UV—creating traceability risk.
Common materials at a glance:
Material Expected Mark Design Risk
Aluminum (6061/7075) Clear, high-contrast, durable Low
Stainless (304/316) Permanent, readable Low
Titanium Dark, sharp, biocompatible Low
ABS (laser-markable grades) Acceptable but contrast varies Medium
POM/Delrin Often low contrast unless pigmented High
Nylon Readability/fade issues common High
If your program depends on identifiers (logos, serials, QR/UDI), start by verifying the substrate—not the laser settings. Metals typically satisfy durability and compliance expectations; plastics require early sample marking of the exact grade and color you plan to release to avoid late rework, rejected batches, or documentation gaps.
Design Takeaway: Default to metal substrates when you need guaranteed readability and durability. If using plastics, specify a laser-markable grade and budget a quick sample-mark check before locking the BOM to avoid costly changes later.
Are there size or geometry limits for laser marking?
Laser marking is flexible, but it’s not unlimited. Small characters or codes can blur together if they fall below about 0.3–0.5 mm in height. On the other end, a single mark larger than ~300 × 300 mm usually requires repositioning, which risks misalignment. For most industrial parts, that working envelope is more than enough — but it’s worth knowing before you lock the CAD.
Geometry matters too. The beam needs a clear line of sight, so marking inside deep recesses, narrow slots, or around sharp corners will give unreliable results. Marks too close to edges may distort or even burn thin material. This isn’t just cosmetic: if a compliance mark straddles a chamfer or disappears into a pocket, it could fail inspection.
The safest practice is to leave one accessible surface specifically for marking. Even a 10 × 10 mm pad ensures flexibility for serials, logos, or QR codes. If you expect to mark on larger panels, confirm machine field sizes early — it’s faster to adjust layout than to fight alignment issues during production.
Design Takeaway: Plan at least one clear, accessible surface for marking. Keep marks away from tight corners or thin edges, and size them above 0.3 mm for readability. If your design requires larger panels or recessed features, check field size and accessibility before release.
Do I need a flat area in my design for marking?
Flat areas are by far the most reliable choice for laser marking. A beam striking a flat or gently curved surface produces consistent depth and contrast, making the mark easy to read under any angle. Once curvature tightens — generally below about a 50 mm radius — readability suffers. The edges of the mark can fade, distort, or stretch, leaving you with a logo or code that looks uneven.
Technically, lasers can mark curved or cylindrical parts using rotary fixtures or software correction. But that adds setup time and increases the risk of misalignment. For high-volume projects, the extra handling cost may be justified. For prototypes or low runs, it’s usually smarter to plan a small flat zone instead. A 10 × 10 mm pad is enough for most identifiers, and designing it in CAD early avoids expensive revisions later.
Surface finish also plays a role. A bead-blasted or matte pad gives the laser more bite and improves contrast, while glossy curves can reflect the beam and lower readability. The trade-off is simple: a flat, matte marking zone will always reduce variability and cost.
Design Takeaway: If marking is critical, integrate a flat or gently curved area during design. It guarantees clarity and avoids extra fixturing. Adding a small pad costs nothing in CAD but saves headaches in production.
Can logos, serial numbers, or QR codes be marked clearly?
Yes — provided you respect scale and contrast. Logos or text above 0.5 mm height are generally legible, but anything smaller risks blurring or disappearing after finishing. QR and DataMatrix codes need both enough resolution and a surface that delivers contrast. On untreated aluminum or stainless, codes scan reliably at sizes above 6 × 6 mm; below that, modules become too fine for consistent readability.
For branding, high-contrast surfaces like anodized aluminum give crisp logos that stay sharp through wear. For functional identifiers such as serials or UDIs, the risk isn’t aesthetic — it’s usability. If a scanner can’t read a code, the part may fail traceability or compliance. That’s why many industries require verification: every QR or barcode is scanned at inspection to confirm readability before shipment.
Surface finish also influences clarity. A matte or bead-blasted background increases contrast, while polished or glossy finishes may scatter light and reduce legibility. That’s worth considering if your logo shares space with aesthetic surfaces — one treatment may favor brand visibility, the other compliance.
Design Takeaway: Keep logos and text above 0.5 mm, and QR codes at least 6 × 6 mm with strong contrast. If compliance depends on readability, include scan verification in your inspection plan. Designing marks within these limits avoids costly rework and regulatory delays.

Does laser marking affect tolerances or fit?
Laser marking does not remove enough material to alter part tolerances — typical marking depth is less than 0.05 mm, far below the dimensional allowances of CNC-milled features. For that reason, it is widely used on aerospace and medical parts held to ±0.01 mm. The risk comes not from dimensional shift, but from localized surface changes.
High-energy passes can slightly texture the surface, add oxide buildup, or cause color variation. On cosmetic housings this may be acceptable, but on sealing lands, sliding bores, or bearing seats, even a small roughened patch can create leaks or interfere with assembly. Surface coatings also matter: anodized aluminum retains contrast well, but deep marking can disturb the oxide layer, while plated surfaces may discolor or flake if marked too aggressively.
In practice, tolerances are safe, but functional faces are not. A shaft bore marked by mistake might still measure in spec yet fail during assembly due to microscopic texture. The safest design choice is to provide a dedicated marking pad away from datums, sealing zones, or sliding interfaces.
Design Takeaway: Laser marking won’t compromise part tolerances, but it can affect surface finish and coatings. Always reserve a non-functional area for marking, and avoid specifying marks on any sealing, mating, or coated precision features.
Should I protect threads or precision surfaces from marking?
Threads and precision surfaces should always be considered off-limits for laser marking. While the process is shallow, the localized heat and oxide layer can alter surface hardness, leaving burr-like texture or discoloration. On threads, this can reduce engagement smoothness, accelerate wear, and even cause galling under torque. On sealing lands, small surface disruptions may compromise O-ring performance or cause leaks.
For this reason, production teams often mask threads and critical features before marking. But from a design standpoint, the better solution is to define safe marking zones early. Adding “no-mark areas” to the drawing or CAD model reduces the chance of operator error. On regulated projects, such as aerospace or medical, inspectors will flag and reject any marked threads or sealing surfaces, even if the geometry is technically unaffected.
A common failure example is etched fastener threads. The mark doesn’t change pitch diameter, but the textured flanks reduce coating adhesion, leading to early corrosion and thread seizure. These are preventable issues if the design makes clear where marking is and is not acceptable.
Design Takeaway: Never allow marking on threads, sealing surfaces, or polished precision zones. Define “safe marking areas” in your model or drawing so production can apply identifiers without risking rework or rejection.
Will the mark color or contrast be easy to read?
Mark readability depends on both material and finish. Aluminum produces dark, sharp marks; stainless steel yields gray-to-black marks depending on settings; titanium can form high-contrast black or oxide colors. Plastics vary most: ABS with additives may mark clearly, while nylon often looks faint from the start.
Surface finish has just as much impact. Matte or bead-blasted surfaces scatter light, improving contrast. Polished stainless or glossy coatings can wash out the mark, making it disappear at certain angles. Anodized aluminum is a strong performer because the oxide layer both increases contrast and protects the mark.
For text, a practical lower limit is 0.5 mm in height for legibility to the human eye. QR or DataMatrix codes should be at least 6 × 6 mm to remain scannable under standard conditions. Smaller marks may be technically possible, but error rates rise quickly. Lighting also matters — a code that scans indoors may fail under outdoor glare or in a factory setting.
To avoid surprises, verification should be part of QC: critical codes should be scanned as part of inspection, not assumed readable.
Design Takeaway: Contrast depends on both substrate and finish. Favor anodized aluminum or matte surfaces for clarity, keep text ≥0.5 mm and QR codes ≥6 × 6 mm, and always include readability checks in your inspection plan.
Will the mark last under wear, chemicals, or UV?
On metals, laser marks are essentially permanent. Black marks on anodized aluminum have been shown to withstand more than 500 hours of salt spray without fading, while stainless steel marks hold contrast even after repeated chemical cleaning. Titanium is similarly stable, with oxide-based marks that resist both abrasion and UV exposure.
Plastics, however, are far less predictable. ABS with laser-reactive additives can hold up under light handling but may show contrast loss after a few weeks of outdoor exposure. POM and nylon marks often fade after contact with alcohol or disinfectants. In medical and aerospace programs, this is why durability testing is not optional — a UDI or traceability code that fails scan verification after sterilization or chemical wipe-down is considered non-compliant.
Surface preparation also influences lifespan. A bead-blasted or matte finish helps the laser create sharper, longer-lasting marks, while polished or glossy surfaces tend to wash out more quickly.
Design Takeaway: Metals with anodized or matte finishes deliver long-term durability. Plastics should always be validated with accelerated tests (UV, chemical exposure, sterilization cycles) before release. Including a durability check in your QC plan ensures marks remain readable in the field.

Is laser marking accepted for compliance or industry standards?
Laser marking is widely accepted across regulated industries, but each framework defines its own rules. Aerospace programs often reference SAE AS9132, which governs data matrix marking on metallic parts. Medical devices fall under ISO 15223 and FDA UDI requirements, which both call for permanent identifiers that survive the product’s lifecycle. Automotive OEMs typically require VIN and component identifiers to be laser-marked for traceability.
The process itself is compliant — rejections usually happen because of poor placement or insufficient durability. A serial code burned into a sealing land may pass tolerance checks but still fail audit. Likewise, a QR code that scans in the factory but fails after cleaning cycles is considered non-conforming.
To avoid this, developers should document “safe marking zones” directly on CAD drawings, and for scannable codes, require readability verification at inspection. That way, the audit trail includes both placement control and performance evidence.
Design Takeaway: Laser marking meets aerospace, medical, and automotive requirements when correctly applied. Always define safe zones on drawings and include scan/durability checks in your inspection plan to satisfy regulators.
Does laser marking add cost or lead time?
When integrated into machining or finishing workflows, laser marking adds little cost — typically less than $1 per part for a simple logo or serial. Lead time impact is measured in seconds, not days. The process becomes expensive only when designs complicate it.
Complex QR or DataMatrix codes can take several seconds each, and multiple marks on different faces add setup time. If marks are placed in recessed areas that require custom fixtures, per-part costs can jump 3–5×. The real lead-time penalty comes when marking is left until the end of the project and outsourced — in that case, an otherwise one-day job may add a week or more.
By planning an accessible flat pad for marking and keeping identifiers within proven readability limits, developers keep costs predictable and avoid bottlenecks. Late changes to relocate or resize marks are far more expensive than the marking step itself.
Design Takeaway: Expect minimal cost and negligible lead time when marking is planned. Complexity, poor placement, or outsourcing late in the process are what drive costs up — not the laser itself.
What design mistakes make laser marks hard to read?
Most unreadable marks trace back to small design oversights. Placing identifiers too close to edges or fillets causes the beam to lose focus, distorting characters. Text below about 0.5 mm in height often blurs, and QR/DataMatrix codes under 6 × 6 mm rarely scan reliably. A mark might pass initial inspection, but fail once coatings or lighting conditions change.
Surface finish is another frequent trap. Polished stainless or glossy coatings can reflect light, making marks invisible at certain angles, while bead-blasted or anodized surfaces give sharp, consistent contrast. Color in plastics matters as well — dark ABS or filled grades can produce clear marks, but light-colored or translucent plastics often look faint from the start. Post-processing adds another variable: painting or powder-coating over marks hides them entirely unless marking happens afterward.
The most preventable mistake is leaving marking as an afterthought. Squeezing logos or codes into leftover space leads to compromised placement and poor readability. Reserving a flat, matte pad in the model gives flexibility and avoids last-minute compromises.
Design Takeaway: Reserve a clear, flat zone for marking, keep text above 0.5 mm and codes at least 6 × 6 mm, and avoid glossy finishes or light plastics without additives. Plan the marking pad early so identifiers remain sharp and compliant through finishing and field use.
How does laser marking compare with engraving?
Both methods create permanent identifiers, but their trade-offs are distinct. Laser marking alters only the surface layer, producing high-contrast marks in seconds. Engraving removes material mechanically, taking minutes per part and leaving a deeper, tactile mark that survives heavy abrasion.
In practice, laser is favored for most industrial identifiers. A serial number or logo can be applied in under 10 seconds, with cost per part often under $1. Engraving, by contrast, may add 2–5 minutes of CNC time and several dollars per part. The difference is especially noticeable in batch production: laser throughput scales quickly, while engraving ties up machining centers.
Surface outcomes differ too. Laser marks are smooth and don’t introduce chips, while engraving leaves a cut that can create stress risers if placed near critical features. That makes laser safer on thin walls or stressed housings. Engraving remains useful when marks must survive harsh wear — for example, calibration blocks, tools, or outdoor equipment exposed to constant handling.
Factor Laser Marking Engraving
Speed Seconds/part Minutes/part
Cost <$1 typical $3–$10 typical
Durability High, but surface-only Extreme, deep-cut
Detail capability Very high (QR, logos) Limited by tool size
Finish impact Smooth, no chips Rougher, may add stress
Design Takeaway: Use laser for speed, detail, and compliance-ready identifiers. Choose engraving only when marks must remain visible under heavy abrasion or where a deep tactile mark is a requirement.
Conclusion
Laser marking makes sense when materials, geometry, and durability are considered early in design. Clear zones, correct substrates, and tested readability prevent costly failures. We help product developers apply these decisions effectively. Contact us to explore manufacturing solutions tailored to your product’s marking requirements.
Frequently Asked Questions
Yes. Laser marking after anodizing is common and produces high-contrast, durable results. On painted or powder-coated surfaces, the mark removes the top layer to expose the base material. If color consistency is critical, plan to mark before coating or specify an anodized finish that reacts well to the laser.
Not if planned early. When integrated into machining or finishing, laser marking usually adds only minutes to the workflow. Delays happen when marking is outsourced as a late step. Reserving a clear pad in your design keeps prototypes on track without adding days to lead time.
Often yes, but requirements differ. Logos are about aesthetics; compliance marks like QR or UDI codes must meet readability and durability standards. If you combine them, ensure the code still meets size and contrast guidelines. It’s safer to reserve separate zones if compliance is critical.
Add a “marking zone” callout with location, minimum size, and “no-mark” notes for sensitive features. For regulated products, specify text height or code size explicitly. Clear documentation avoids operator guesswork and reduces rejection risk at inspection.
No. Because laser marking only changes the surface layer, it does not add inks or labels that interfere with recycling. This makes it preferable to stickers or printing for products requiring sustainability or end-of-life material recovery.

