When Should You Consider Copper Electroplating for Your Parts?
Copper electroplating is widely used in aerospace, audio, and medical components, but many designers hesitate over when to apply it. We created this guide to cut through uncertainty and show where copper adds value — from improving adhesion to supporting multi-layer finishes.
You should consider copper electroplating when your part requires improved electrical conductivity, enhanced adhesion for subsequent finishes, or dimensional uniformity before final plating. It’s not always a standalone corrosion barrier, but as an underlayer it often improves performance, solderability, and cosmetic consistency.
Learn how copper interacts with base materials, what thickness to specify, and when to use it as an undercoat—plus its impact on tolerances and finishes.
Table of Contents
When should I consider copper electroplating for my design?
Consider copper electroplating if your part requires conductivity, a smooth base for cosmetic finishes, or strong adhesion for nickel, gold, or other topcoats. Skip it if your only goal is corrosion resistance — copper alone is not a durable protective layer.
From our machining experience, copper is most valuable when plating supports the function of the part: audio chassis needing a flawless cosmetic finish, medical connectors requiring solderability, or aerospace housings where nickel must bond evenly. Typical thickness is 5–25 µm, depending on whether it’s used as an undercoat or for leveling. Even at these ranges, plating adds measurable thickness — so always review fits and tolerances on tight assemblies.
Design Situation Copper Plating Helps If Skipped
Multi-layer finish (nickel, gold) Improves adhesion Risk of peeling/blistering
High cosmetic requirement Smooths machining marks Uneven finish, visible tool lines
Electrical/soldered contact Enhances conductivity Solder failure, higher resistance
Only corrosion protection needed Not recommended Use nickel/chrome instead
Standards note: For regulated industries, ASTM B571 adhesion testing and ASTM B456 plating thickness criteria are often used to qualify copper undercoats. Aligning with these helps avoid rework during audits or compliance checks.
Cost/lead time impact: As an undercoat, copper usually adds minimal cost and only 1–2 days of process time, but thick leveling deposits may increase both.
Design Takeaway: Use copper electroplating when you need adhesion, conductivity, or cosmetic leveling, but don’t rely on it for long-term corrosion protection. Calling it out correctly in your drawing — and adjusting for thickness — prevents finish failures and costly redesigns later.
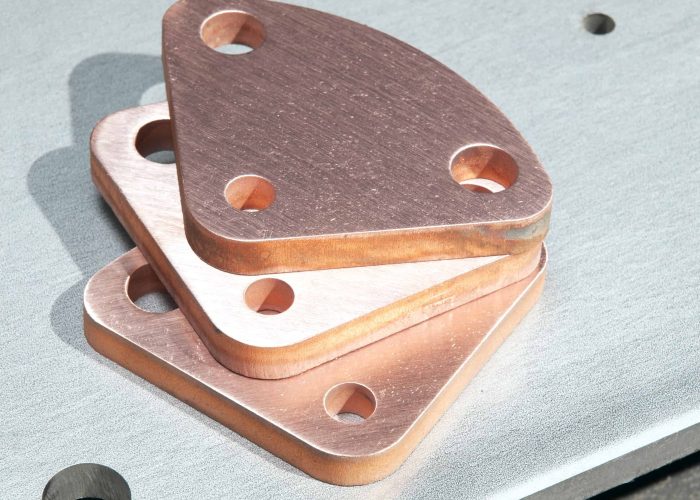
Is my chosen base material compatible with copper plating?
Copper plating adheres reliably to most CNC metals — including aluminum, brass, and carbon steels — but struggles on stainless steels and plastics without extra steps. Compatibility depends on surface preparation and whether an underlayer (strike) is required.
From our machining experience, aluminum housings and brass connectors take copper plating well, creating a smooth base for nickel or gold finishes. Carbon steels are also good candidates but can corrode underneath if not properly sealed. Stainless steels often fail without a nickel strike, leading to peeling or blistering. Plastics like POM or ABS require chemical pre-treatments that add cost and risk — they’re rarely practical for CNC part plating.
Base Material Compatibility Notes
Aluminum High Smooths surfaces; common for enclosures
Brass / Copper alloys High Excellent adhesion for electrical parts
Carbon steels Medium–High Needs sealing; risk of underfilm corrosion
Stainless steels Conditional Nickel strike required; peeling if skipped
Plastics (POM, ABS, etc.) Low Needs pre-treatment; often uneconomical
Standards note: ASTM B571 adhesion testing is commonly used to verify bonding on stainless and difficult alloys.
Design Takeaway: Copper plating works well on most metals, but stainless requires a nickel strike and plastics are usually impractical. In drawings, note “nickel strike required” when plating stainless — it avoids failed adhesion and saves costly rework.
Will copper plating thickness affect my tolerances or fits?
Yes — even thin copper deposits change dimensions, and must be factored into tight-tolerance fits. A 5–25 µm layer may seem small, but on both sides of a shaft or bore, it can quickly close critical clearance.
For example, a 10 µm copper layer on each side of a 10 mm shaft reduces total clearance by 20 µm. We’ve seen product developers run into bearing fit failures when plating wasn’t accounted for in CAD.
Rule of thumb: If your design requires clearances tighter than ±50 µm, you must adjust for plating buildup. Otherwise, the deposit can push parts outside functional fit.
In practice, plated dimensions should be specified as after-plating requirements. For example, a bore might be machined oversize by the expected copper thickness, with the drawing tolerance applied to the plated condition. This avoids ambiguity and ensures suppliers machine with plating allowance in mind.
Standards note: ASTM B456 defines thickness classes for copper deposits and should be cited for consistency when plating tolerance is critical.
Design Takeaway: Always clarify whether tolerances apply before or after plating. If clearances are below 50 µm, plating thickness cannot be ignored — machining allowance is cheaper than scrapping misfit assemblies.
How should I call out plating thickness on my drawing?
Always specify copper plating thickness as an “after-plating requirement” and give a tolerance range (e.g., 5–10 µm per ASTM B456). This prevents confusion over whether the machinist should meet the dimension before or after plating.
We’ve seen plenty of drawings cause scrap because they didn’t clarify this. A simple bore at Ø10.00 mm ±0.01 might be machined to size, then plated, and end up oversize and unusable. To avoid this, most developers include a general note such as:
“All copper plating per ASTM B456, thickness 5–10 µm. Critical dimensions apply after plating.”
That way, there’s no ambiguity about which surfaces are controlled. For critical fits, use a plating symbol or GD&T annotation to make it explicit.
As for variation, expect ±2–3 µm thickness tolerance across a well-controlled plating run. That’s usually enough accuracy for cosmetic or adhesion purposes, but not something you should rely on for tight tolerance fits.
Design Takeaway: State plating thickness as an after-plating requirement and call out critical features individually. A single note in the title block, plus explicit control where needed, saves both suppliers and QA teams from expensive misunderstandings.
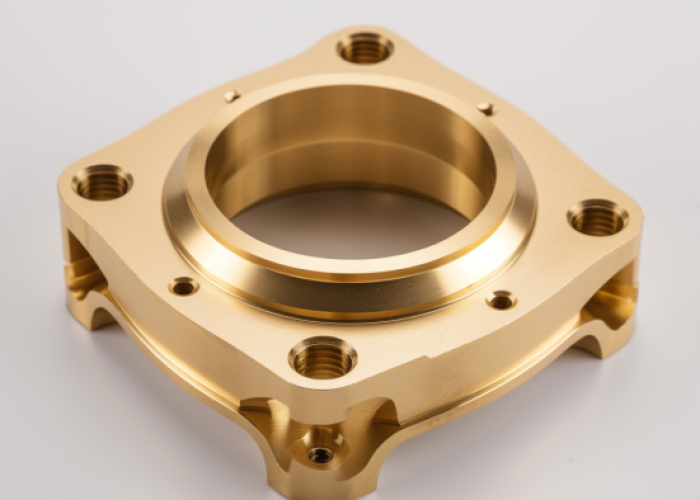
Does copper plating alone provide corrosion protection, or do I need a topcoat?
Copper plating alone is not a corrosion barrier — it tarnishes within weeks in normal conditions and can corrode faster in humidity or marine environments. If your design requires long-term corrosion protection, copper should only be used as an underlayer with nickel, tin, or gold as the final finish.
In practice, copper is specified for conductivity, solderability, or adhesion — not durability. A medical housing might use copper as a base for nickel and gold to ensure both performance and cosmetic stability. Aerospace parts often use copper under nickel to achieve uniform adhesion. If left exposed, copper quickly oxidizes to a dull brown or green, which can compromise both function and appearance.
Procurement teams are familiar with this — in fact, if a drawing only lists “copper plate,” most platers will flag it and ask whether you intended a topcoat. Calling this out upfront avoids unnecessary back-and-forth.
Finish Approach Typical Stack Corrosion Protection Notes
Copper only Cu (5–25 µm) Poor Tarnishes quickly; not accepted in most industries
Copper + Nickel Cu + Ni Good Nickel acts as barrier layer
Copper + Nickel + Gold Cu + Ni + Au Excellent High-cost; connectors, medical, aerospace
Copper + Tin Cu + Sn Good Common in soldered electrical parts
Design Takeaway: Treat copper as a foundation, not a finish. If corrosion protection matters, specify a protective topcoat from the start — it avoids tarnish, improves performance, and prevents procurement delays.
Will copper electroplating change the look of my part over time?
Yes — exposed copper will tarnish quickly. Within 2–3 weeks in normal indoor air it dulls to a brown tone, and in humid or marine environments it can develop green oxides even faster. If your design depends on stable appearance, copper alone will not hold its finish.
We’ve seen this issue firsthand. Audio housings plated in copper for their warm tone lost their appeal within months unless sealed with lacquer or coated with nickel. Even when hidden inside assemblies, copper’s surface chemistry makes oxidation inevitable. Standards reflect the same reality: copper is classified as an undercoat, not a decorative or corrosion-resistant finish.
Developers sometimes want the aesthetic of bare copper. If that’s the case, the only way to preserve the look is to seal it with a clear coating, knowing that scratches or wear will still expose the metal underneath. For long-term stability, copper should be treated as a functional base layer that is always topped with a more durable coating such as nickel, tin, or gold.
Design Takeaway: If visual stability matters, don’t rely on copper as the final finish. It should be specified as a hidden functional layer. For cosmetic appeal, pair it with a lacquer or protective topcoat so the appearance remains consistent over time.
Should I use copper as an underlayer for nickel, gold, or other finishes?
Yes — copper is widely used as an underlayer because it improves adhesion, levels surfaces, and provides a conductive base for nickel, gold, or tin. In many industries, copper is considered an essential step in multi-layer plating stacks.
From our experience, skipping copper creates problems: aerospace parts that put nickel directly on aluminum risk peeling during thermal cycling; medical connectors plated without copper often show patchy gold coverage; and audio housings finished without a copper base reveal machining marks that nickel alone can’t hide. Copper’s ductility also helps absorb stresses between hard coatings and the base metal, reducing the risk of cracking.
A practical guideline is simple: use 5–10 µm when adhesion is the main goal, and up to 25 µm if you need surface leveling. Without this step, developers face adhesion failures, cosmetic defects, or costly rework. Industry standards such as ASTM B456 recognize copper as an intermediate layer, not a finish, and outline typical thickness classes.
Design Takeaway: Use copper as the bridge layer that makes other finishes reliable. Whether the final stack is nickel, gold, or tin, copper provides the adhesion and consistency needed for demanding aerospace, medical, and cosmetic applications.
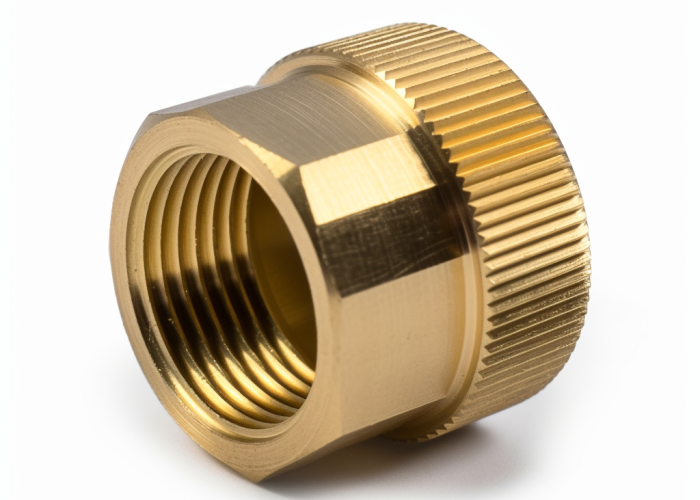
What surface prep do I need to specify before plating?
For reliable copper plating, surfaces must be clean, smooth, and free of machining residues. Developers don’t need to prescribe every cleaning step, but they do need to define the condition the surface must meet so plating adheres properly.
Problems often arise when machining leaves burrs, tool marks, or residual cutting fluids. Copper exaggerates these imperfections — instead of hiding them, it highlights every flaw. On cosmetic-critical parts like audio housings, scratches become even more visible after plating. On regulated components, like medical housings, surface contamination can lead to peeling or blistering during testing.
A practical rule of thumb: Ra ≤ 3.2 µm is sufficient for most functional parts, while Ra ≤ 1.6 µm should be specified for cosmetic-critical or sealing surfaces. It’s also common for QA teams to verify finish quality with profilometers before plating begins, so including a target Ra gives everyone a clear reference.
Finally, don’t forget to flag areas that should remain unplated. Masking is possible, but it adds cost and time, so the earlier those surfaces are identified, the smoother the process.
Design Takeaway: Call out surface finish, cleanliness, and unplated areas in your drawings. This approach prevents plating failures while keeping requirements realistic for your suppliers.
Will copper electroplating add significant cost or lead time?
Copper plating as an undercoat usually adds minimal cost and 1–3 days to lead time. The real cost drivers are thick leveling deposits, complex masking, or multi-layer stacks with nickel, gold, or tin.
For reference, a thin copper strike (5–10 µm) may add only a few dollars per part. In contrast, a cosmetic-critical finish like copper–nickel–gold can add 20–30% to overall finishing cost. That’s where budgets can get strained — not from the copper itself, but from the layers that follow.
Lead time impact is similar. If machining and plating are handled under one roof, copper plating adds only a short process step. If parts must travel between vendors, expect days lost to packaging, shipping, and coordination. This is why consolidating machining and plating with a single supplier is often the most reliable option.
For product developers, the key is expectation setting: specify copper only when it provides functional or cosmetic benefit, and anticipate extra time if a stacked finish or masking is required.
Design Takeaway: Copper plating itself is a low-cost, low-delay step — but stacked finishes, masking, and outsourcing are where time and money add up. Plan for them early to keep schedules predictable and quotes accurate.
What defects or risks should I know about in copper plating?
Copper plating can introduce risks such as peeling, blistering, uneven thickness, or accelerated corrosion if not paired with a topcoat. Understanding these potential defects helps developers decide whether copper is appropriate for their design.
The most common issue is poor adhesion. On stainless steel, copper may peel if a nickel strike isn’t applied first. On parts with machining oils left behind, blistering can appear during plating. Another frequent risk is uneven thickness, especially on sharp corners, recessed features, or deep bores, where copper tends to build up irregularly. This can throw off tolerances if not considered in CAD.
Copper itself is also prone to oxidation and galvanic corrosion. Exposed layers tarnish quickly, and if copper is in contact with dissimilar metals in humid environments, it can accelerate corrosion rather than prevent it. For cosmetic-critical parts, any plating porosity can allow the base metal to discolor through the finish.
These risks can’t always be eliminated, but they can be controlled by planning. Clear callouts for surface finish, “after-plating” dimensions, and topcoat requirements greatly reduce the chance of plating-related failures.
Design Takeaway: Expect copper plating to highlight imperfections and add its own risks. Treat it as a functional underlayer, specify critical conditions in your drawings, and always use a protective topcoat if corrosion or appearance matters.
Conclusion
Copper electroplating is rarely a final finish but often a critical underlayer. When specified correctly, it improves adhesion, conductivity, and appearance consistency. At Okdor, we help developers balance these benefits with cost and tolerance realities. Contact us to explore copper plating solutions tailored to your part requirements.
Frequently Asked Questions
Yes. Masking is standard practice, but it adds both cost and time. Identify critical unplated surfaces on your drawings early to avoid delays and unnecessary charges.
Yes. Copper is highly conductive, and even a thin layer improves electrical performance. It is commonly used under nickel or gold to maintain low resistance in connectors and contacts.
For adhesion purposes, 5–10 µm is usually sufficient. This thin deposit ensures topcoats like nickel or gold bond reliably without adding unnecessary thickness or tolerance risk.
Always apply the tolerance to the after-plating dimension. For example, if a bore must finish at Ø10.00 ±0.01, machining should allow for plating thickness. Use GD&T or notes to make this unambiguous.
Yes, but coverage may be uneven. Deep or blind holes often plate thinner, which can affect fit. If plated threads are required, specify them clearly and allow extra inspection.
Common methods include X-ray fluorescence (XRF) for non-destructive testing and cross-section analysis for destructive checks. Adhesion may also be validated using ASTM B571 tape or bend tests.
